Step-by-Step guide how to install WP-CLI on WAMP and XAMPP for Windows
What is WP-CLI?
WP-CLI is a command line tool to manage operations of a WordPress project. It can manage posts, categories, users, search-replace in the DB, change passwords and more!
WP-CLI is very extensible/useful and we can do many more things quickly.
Prerequisite: The minimum PHP version 5.4 is required to run WP-CLI v2.0.0 so upgrade you PHP version if not match with minimum requirement.
Let discuss in detail but installation: You just need to follow below steps and it will be ready in few minutes.
Step 1: check pre configurations PHP
Open the CMD (win+R-> type cmd) and type php -v command to check PHP variable in configured or not. Just verify this above because if you have installed PHP but not configured environment variable in system then it will show below error. Error: php’ is not recognized as an internal or external command, operable program or batch file.
(for Xampp):
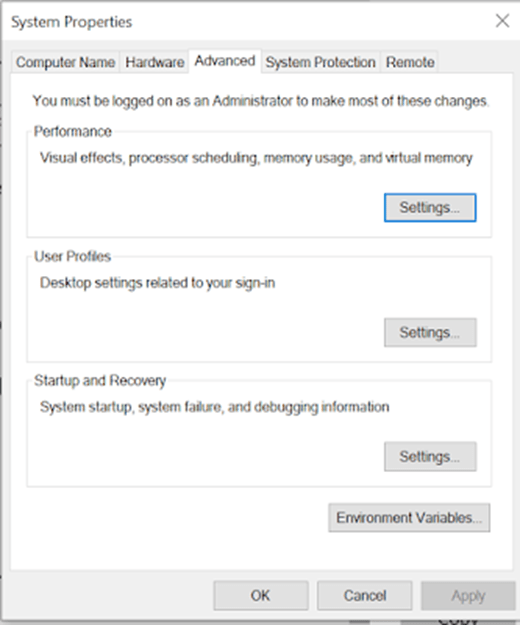
XAMPP does not provide in-build console to run php commands, so, you have to add to environment variables under Control Panel\System and Security\System > Advanced system settings > Environment Variables like below screen
- Select “Path” from “System Variables” and click on “Edit” button
- Now set path where php.exe file is located – For XAMPP, it is installed in to C: drive then Path is “C:\xampp\php“
- Paste this above directory path at end of the path and sperate with semicolon
- Click Ok and Apply.
(for wamp):
Wamp server have different directory structure so PHP is available under c:\wamp\bin\php\php.#.#.# (here last directory based on PHP version you have running on)
Copy this path
Now you have to add to environment variables under Control Panel\System and Security\System > Advanced system settings > Environment Variables
- Select “Path” from “System Variables” and click on “Edit” button
- Paste you copied PHP directory path at end of the path and sperate with semicolon
- Click Ok and Apply.
Step2: Install wp-cli for windows
- Download wp-cli.phar manually and save it to a folder, for example c:\wp-cli
- Create a file named wp.bat in c:\wp-cli with the following contents:
@ECHO OFF
php "c:/wp-cli/wp-cli.phar" %*
Step 3: Set environment variable for wp-cli
Add c:\wp-cli to your environment path. Go to Control Panel\System and Security\System > Advanced system settings > Environment Variables
- Select “Path” from “System Variables” and click on “Edit” button
- Paste you copied wp-cli directory path at end of the path and sperate with semicolon
- Click Ok and Apply.
Step 4: Confirm after setup all
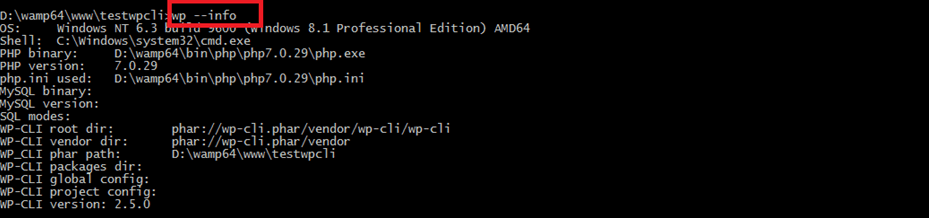
In order to check that everything is working properly, you can run the info command:
Open the CMD (win+R-> type cmd) and type wp –info command to check WP-CLI is now available or not. You can see similar output like below screen
Step 5: Done
That’s it. Enjoy!
It will save you from lot of clicks, page load time.