
macOS Sequoia arrived on Macs in September 2024. Many individuals have put in Sequoia and adore it, whereas others have put in the up to date solely to remorse it later. Maybe you’ve found that an app you depend on not works or is buggy? Possibly you hate one of many new options? Or you might be pissed off that your Mac can’t make the most of all the brand new options. The excellent news is that it’s doable to revert to a earlier macOS model.
One other subject is that typically when Apple updates the Mac working system with new options, customers encounter issues with the newest model and have to revert again to the earlier macOS. Our recommendation is often to attend a couple of days or even weeks earlier than putting in a significant replace for that reason (though typically it’s beneficial you put in it straightaway if the replace is important for safety causes.)
Fortunately it’s doable to revert to the earlier model of macOS from earlier than the replace, however, sadly, it isn’t so simple as discovering the older model of the Mac working system and reinstalling it–and it could possibly imply you lose a few of your knowledge.
Possibly you must run an older model of the macOS on a Mac you might be utilizing to check apps as a part of your job. We now have a separate article that appears at numerous methods to downgrade to older variations of macOS. You might also need to take a look at different methods to put in the older model of macOS, corresponding to putting in it on a separate quantity (also referred to as twin booting) or operating it on a separate drive.
Beneath, we’ll run by means of the steps to downgrade your Mac from the newest model of macOS Sequoia to an older one, or from Sequoia to Sonoma. If you wish to downgrade from a beta model of macOS we have now a separate article coping with downgrading from a beta model of macOS.
If it’s iOS you need to roll again it’s not so easy as a result of Apple stops older variations of iOS being accessible. Examine how you can downgrade from iOS 18 to iOS 17.
The right way to revert a macOS replace
It’s not all the time a totally new model of macOS you need to revert from. Apple points a number of level updates all year long and if one thing breaks in your Mac following that replace you could need to return to the earlier model. This may very well be from Sequoia 15.1 to fifteen.0, or it may very well be from macOS Sonoma 14.7 to 14.6. On the time of writing Sequoia hasn’t been up to date past 15.0, however when it’s it is going to be doable to drop again to the earlier model of Sequoia.
So, if there’s something in an replace to Sequoia that’s inflicting issues for you, you possibly can revert to an older model of macOS, however you will have to wipe your Mac to take action. The strategy might be decided by whether or not of not you have already got a backup (and the way previous that backup is).
With a backup from earlier than your replace: You probably have a backup, all you must do is wipe your Mac after which get well your backup with the older model of the backup from earlier than your replace to the brand new macOS.
And not using a backup: When you don’t have already got a backup, you will have to backup the information in your Mac as a result of the method includes wiping your Mac after which doing a clear set up of the macOS you need. In your backup it’s best to use a backup software aside from Time Machine*.
You’ll discover extra particulars on how you can use each of those strategies to revert to an older model of macOS under.
*Why you shouldn’t use Time Machine for this backup: Apple’s Time Machine is not any good right here as a result of when it backs up your Mac it can again up the present model of macOS as effectively, and if you get well your Mac from the backup you’ll get well that model too. You possibly can use a software like Carbon Copy Cloner (which has a free 30-day trial or prices £52/$49.99), and doesn’t make you again up the working system. Try our suggestions right here: Finest backup software program for Macs. We even have recommendation about The right way to again up a Mac.
The right way to downgrade from Sequoia to Sonoma
Chances are high you arrived on this text as a result of you could have up to date to Sequoia and remorse it. The method is simply the identical as in case you are reverting from a minor replace to macOS.
With a backup from earlier than your replace: You probably have a Time Machine backup from earlier than the replace, you possibly can revert to that, however you’ll lose any new knowledge, so be sure to again up (however not with Time Machine, as defined above).
And not using a backup: When you don’t have a backup you will have to make one after which get well your knowledge to your Mac after wiping your Mac and doing a clear set up of macOS Sonoma.
We’ll take a look at the assorted choices and how one can downgrade from macOS Sequoia to Sonoma under.
Choice 1: Downgrade macOS utilizing a Time Machine backup
You probably have an older Time Machine backup from earlier than you upgraded the downgrade course of is lots simpler. Together with your pre-Sequoia Time Machine backup in hand, you possibly can get well your machine from earlier than the replace after which copy again any recordsdata you created after you put in Sequoia.
That is our most well-liked technique as a result of Time Machine backs up your settings and apps in order that if you get well from that backup every thing is precisely the way in which you might be used to it being, which could be comforting. So long as you could have previous backups it’s best to be capable of return to a date earlier than your improve and get well that model of your Mac. Simply keep in mind that something you could have completed since then might be misplaced since you’ll wipe every thing in your Mac as a part of the method, so you will have to make a non-Time Machine backup of these recordsdata.
Right here’s how you can get well the previous model of macOS utilizing Time Machine:
- Plug your Time Machine disk into your Mac.
- Restart your Mac.
- You probably have an Intel Mac maintain down Command + R till the Apple emblem seems. You probably have an M1 or later Mac you must press and maintain the ability button till the Choices menu comes up.
- When the choices seem on the display, select ‘Restore From Time Machine Backup’ and click on Proceed.
- The subsequent display will present the phrases Restore from Time Machine, click on Proceed once more.
- Subsequent, choose your Restore Supply – this must be your backup drive.
- The subsequent display exhibits all of your backups over time, decide the final one you made previous to updating to the newer model of the Mac working system. (You’ll be able to see which model of macOS the again up was made in).
After getting restored the older model of macOS out of your Time Machine backup, you possibly can get well the recordsdata you created since out of your non-Time Machine backup.
However what for those who don’t have a Time Machine backup?…
Choice 2: Wipe your Mac and do a clear set up of the older macOS
Word that this technique will erase your Mac, so do be sure to have a backup of vital recordsdata.
When you don’t have a Time Machine backup from earlier than you up to date your Mac, all is just not misplaced. You’ll be able to set up an older model of macOS in your Mac, however you will have to wipe your Mac first. Wiping your Mac means you’ll lose your knowledge for those who don’t again it up. Bear in mind backing it up with Time Machine gained’t be helpful right here as you’ll get well Sequoia alongside together with your knowledge. Check out our suggestions in: Finest backup software program for Macs. We even have recommendation about The right way to again up a Mac.
Get the installer
Screenshot
Foundry
The primary stage of this technique is to get the installer for the model of macOS you require, with the prerequisite that your Mac wants to have the ability to run it. See: macOS compatibility–the variations your Mac can run.
We now have hyperlinks to some latest variations of macOS under so you possibly can obtain the one you need.
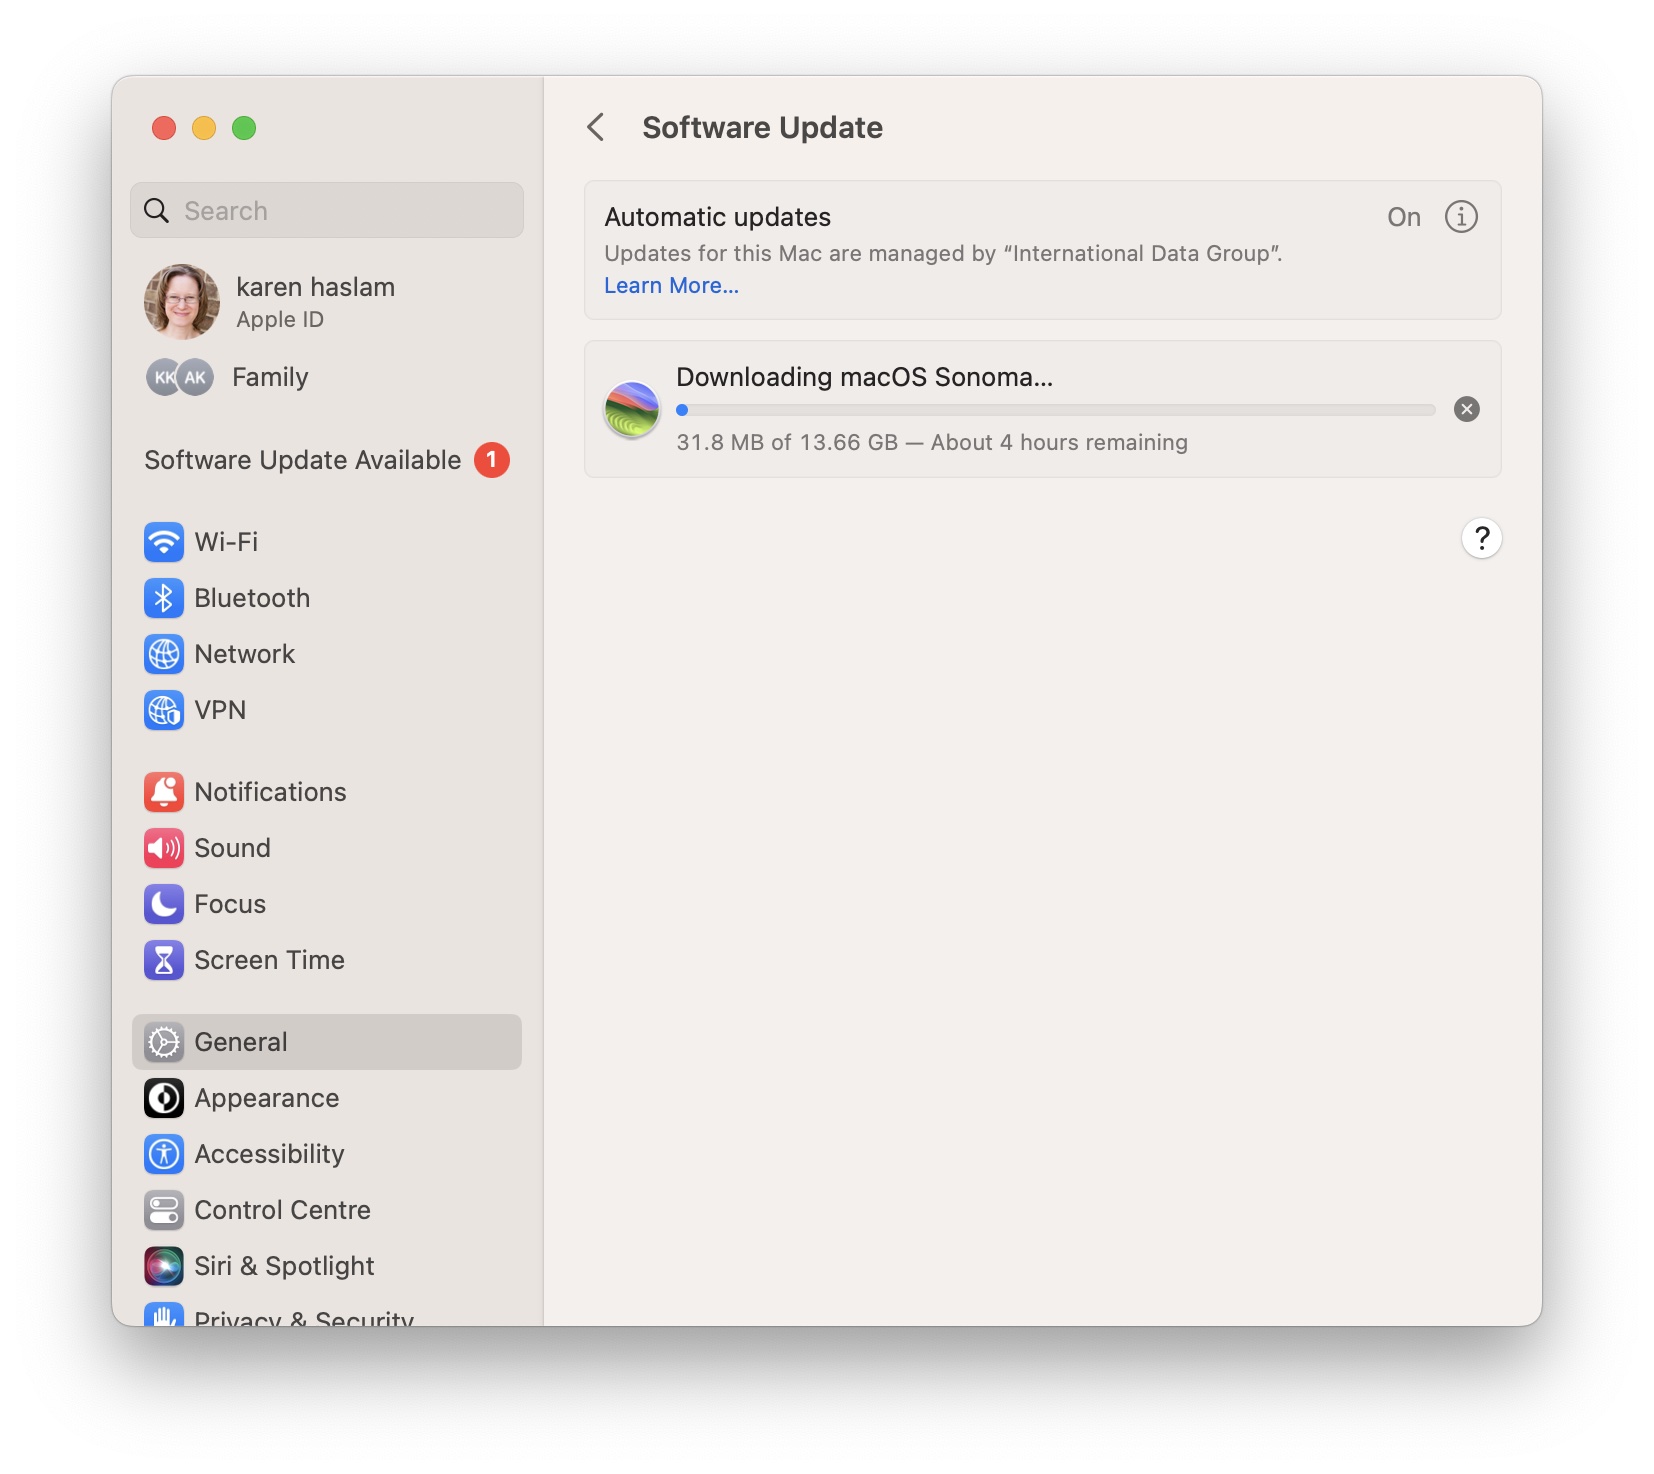
- To begin you must seize the installer of whichever model of macOS you need to set up from the Mac App Retailer utilizing the hyperlinks above. If you need an older model see this text: The right way to obtain previous variations of macOS. Once you click on the hyperlink above it ought to take you on to the Mac App Retailer, if that doesn’t occur shut the Mac App Retailer whether it is open and be sure to are utilizing Safari.
- Click on on Get.
- The Software program Replace window from System Preferences will open and it’s best to see a pop-up overlaying it with the model you need to obtain. Click on on Obtain and ensure that you simply need to obtain the software program (you’ll additionally see a warning that you’re downloading an older model of the OS, ignore it.)
- As soon as it’s downloaded DO NOT click on on Open – you don’t need to set up it but.
Create a bootable installer
Foundry
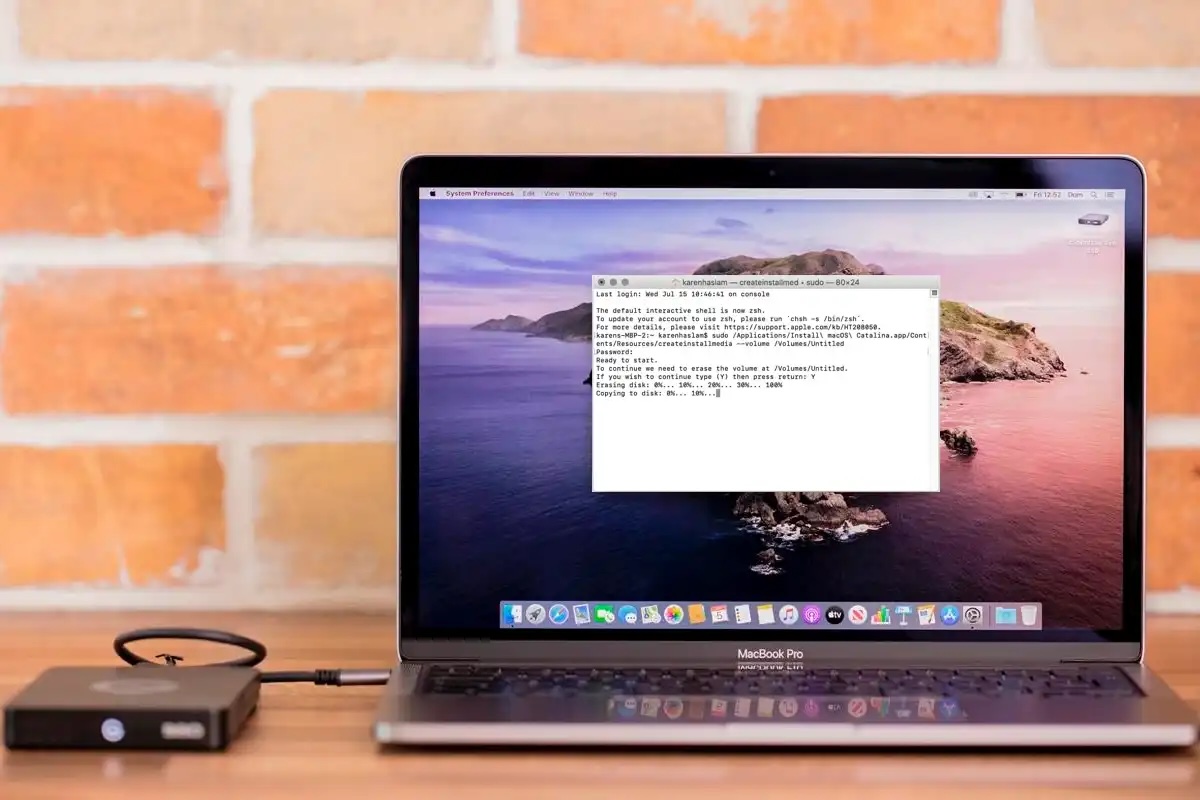
You gained’t simply be capable of set up Sonoma over Sequoia, or any previous model of macOS over a more recent one. To be able to set up an older model of macOS in your Mac you must make a bootable installer that features the set up recordsdata.
To make a bootable installer, from which you’ll reinstall the older macOS, you will have a reminiscence follow no less than 15GB house however we’d suggest extra. You’ll have to reformat that drive and put together it in Disk Utility after which use Terminal to enter the createinstallmedia command for the model of macOS you might be putting in.
Within the case of Sonoma that is:
sudo /Functions/Set up macOS Sonoma.app/Contents/Sources/createinstallmedia –quantity /Volumes/MyVolume
You will want to interchange MyVolume with the identify you could have given to the drive you might be utilizing because the bootable installer.
We suggest that you simply observe the steps outlined on this article: The right way to create a bootable installer of macOS to create your bootable installer. You’ll discover all of the createinstallmedia instructions in that article.
Use the bootable installer to downgrade your Mac
Foundry
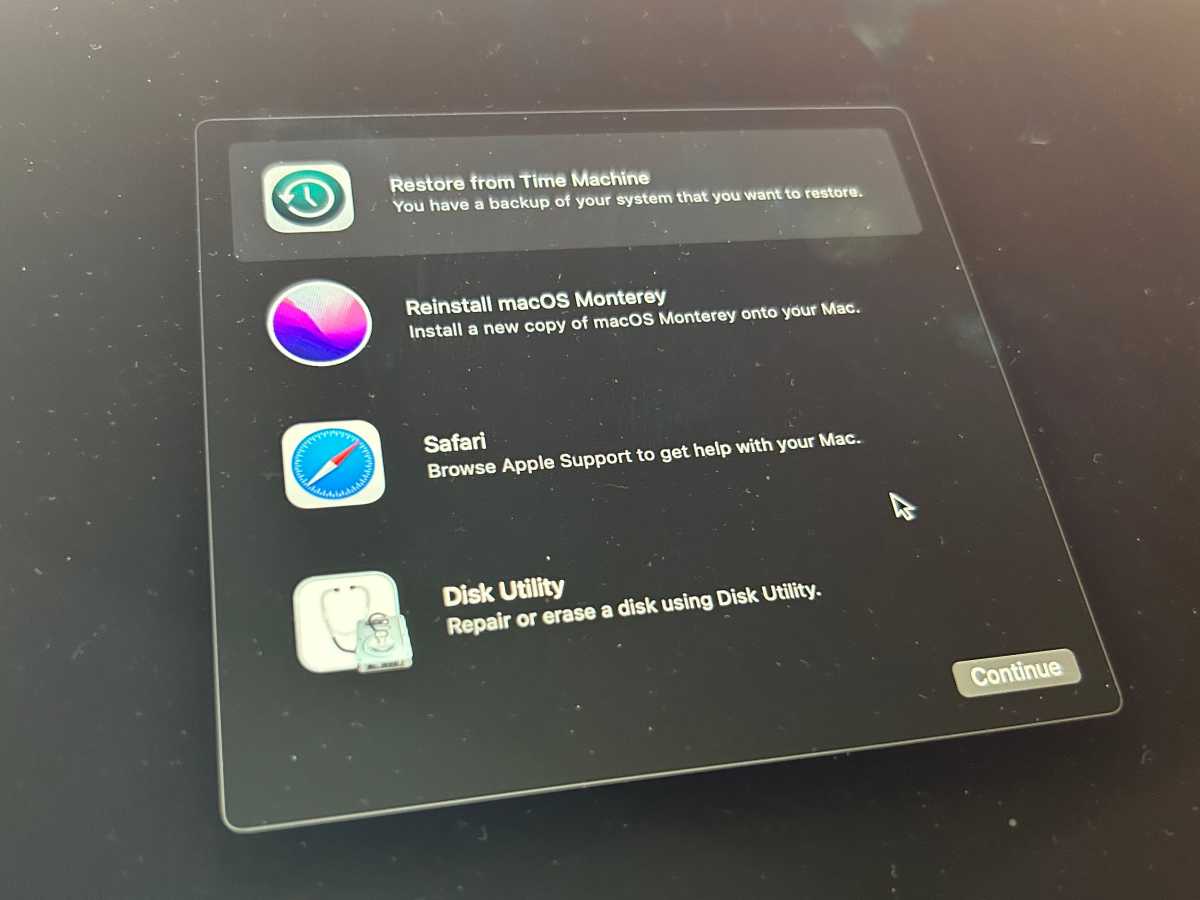
Now you could have your bootable installer it’s best to be capable of set up the older model of macOS in your Mac utilizing it.
- Join the bootable installer to your Mac.
- Open System Settings and click on Basic > Startup Disk.
- Select the exterior drive together with your installer because the startup disk and click on Restart.
- Your Mac will shut down and restart in Restoration mode.
- You will want to hook up with Wi-Fi as a result of your Mac might want to connect with the web throughout this course of. Entry Wi-Fi settings from the Wi-Fi menu.
- Choose Reinstall macOS from Utilities.
- Click on Proceed.
Arrange your Mac as new and get well your backed-up recordsdata
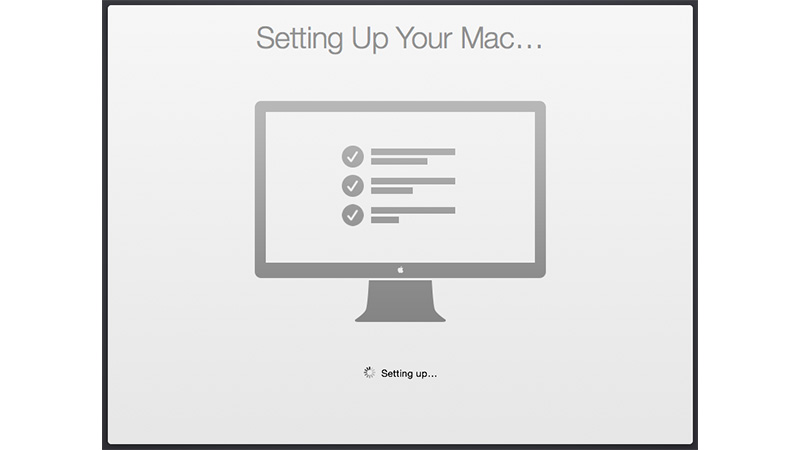
Foundry
Now that you’ve got wiped your Mac and put in the model of macOS you needed you will have to run by means of the set-up course of. See The right way to arrange a brand new Mac for assist with that.
As soon as your Mac is up and operating you possibly can get well the information you backed up.
The right way to repair issues downgrading a Mac
This stuff don’t all the time go easily. Listed here are a couple of points you would possibly encounter:
Wiping an older Mac
In case your Mac is previous than the previous couple of Intel Macs, otherwise you aren’t operating Monterey, you will have to erase your Mac following the steps in our tutorial on wiping a MacBook or Mac. We suggest that you simply observe that tutorial as there are a whole lot of steps it’s best to take to make sure that you don’t create extra issues for your self.
What to do if booting from exterior media doesn’t work
In case you are utilizing a Mac with a T2 Chip then you must be certain that you allow booting from exterior media or this is not going to work. To do that you must entry Restoration Mode after which select Startup Safety Utility from the menu. Right here you will note plenty of choices together with these for Safe Boot and people for Allowed Boot Media. It’s on this second part that you will see that Enable booting from exterior or detachable media. You will want this chosen in addition from a bootable drive.
What to do if the previous macOS gained’t set up
If the above doesn’t work you could have to utterly wipe your Mac earlier than reinstalling macOS from the bootable drive.
We clarify intimately how you can erase a Mac on this article: The right way to erase a MacBook or Mac: restore to manufacturing facility settings and we advise that you simply observe that tutorial. You probably have a Mac with T2 chip, or an M-series Mac erasing your Mac may be very easy because of the Erase All Content material And Settings choice. This setting was discovered within the menu of System Preferences however with the arrival of System Settings it’s now positioned in System Settings > Basic> Switch or Reset.
Reinstalling an older macOS through Restoration mode
Relying on the age of your Mac there is perhaps an choice to get well the unique model of macOS it shipped with utilizing macOS Restoration.
You gained’t be capable of revert to one thing older than the macOS your Mac shipped with.
Observe these steps to reinstall the model of macOS your Mac got here with, or one that’s near that:
- Flip off your Mac.
- Restart it whereas holding down Shift + Choice/Alt + Command + R to enter Web Restoration Mode (be sure to are related to the web).
- Select the Reinstall macOS choice.
- Click on Set up.
This might can help you set up the working system that your Mac shipped with. Sadly, after we tried this technique we had been unable to get well an older model of macOS, it appears that evidently it really works just for some Macs.
The right way to keep away from issues if you downgrade macOS
Reversing an improve carries with it plenty of wrinkles and pitfalls.
Most of those are attributable to adjustments in file codecs and settings between variations of the OS. So, for instance, for those who create a doc or work on a file in a brand new model, whether or not it’s a beta or full launch, of macOS after which attempt to open it in an older model, it might not work.
To mitigate this, it’s sensible to export any paperwork you’ve created or labored on within the newer OS in a regular file format. So, for instance, for those who use Scrivener or Ulysses, export paperwork as RTF recordsdata. That approach, if the native recordsdata don’t survive the reverse improve, you’ll be capable of re-import the RTF recordsdata.
Take screenshots of preferences and settings
Everytime you carry out a clear set up of macOS, which is what you’re doing right here, it’s a good suggestion to take screenshots of any customized settings you’ve created in apps or in System Settings (or System Preferences). That makes it simpler to re-create them later.
You also needs to make an observation of consumer account and password particulars for something you’ve arrange whereas operating the brand new model of the OS. When you don’t use iCloud or Chrome to synchronise bookmarks, it’s a good suggestion to export these and make a replica.
And except you’re utilizing the migrate knowledge choice outlined above, you’ll additionally want installers and license codes for apps you employ. If these are downloads from the Mac App Retailer, you possibly can simply re-download them from the Bought part within the App Retailer. If not, be sure to can obtain them from the seller’s web site. When you don’t use a password supervisor to retailer license codes, be sure to’ve received a replica of them earlier than you begin.
Synchronize
When you use Dropbox, OneDrive, Google Drive or another type of cloud storage, make sure that your knowledge is in sync earlier than you begin the method of reversing an improve. It’s straightforward to overlook that the recordsdata that dwell in your Dropbox folder, for instance, are native recordsdata and that whereas synchronization is frequent, the lack of an web connection will stop it and you may have recordsdata in your native folder that haven’t but been copied to the cloud.
Clicking on the cloud service’s emblem in your menu bar ought to inform you whether or not synchronization accomplished efficiently and recordsdata are updated.
When you use Gmail, iCloud mail or another IMAP server in your e mail, make sure that it’s updated and any drafts you’ve composed lately have been synchronized. When you use a POP3 account you’ll must manually again up the mail database and restore it after you reverse the improve. Or, for those who solely have a couple of messages you must preserve, ahead them to a Gmail account – you may set one up particularly for that goal.