In any person interface, focus performs a vital function in figuring out which factor receives the following enter. SwiftUI gives a robust set of instruments and consider modifiers that let you management and handle focus in your apps. By utilizing these modifiers, you possibly can point out which views are eligible to obtain focus, detect which view at present has focus, and even programmatically management the main focus state.
On this tutorial, we are going to discover the ins and outs of SwiftUI’s focus administration API, empowering you to create partaking and interactive person experiences. Particularly, we are going to dive deep into the utilization of key property wrappers like @FocusState, @FocusedValue, and @FocusObject.
Working with @FocusState
Let’s first begin with @FocusState. With this wrapper, builders can simply handle the main focus of particular views and monitor whether or not a view is at present in focus. To look at and replace the main focus state of a view, we generally use the centered modifier along with the @FocusState property wrapper. By leveraging these APIs, you’ll acquire exact management over the main focus habits of SwiftUI views.
To offer you a clearer understanding of how centered and @FocusState work collectively, let’s stroll via an instance.
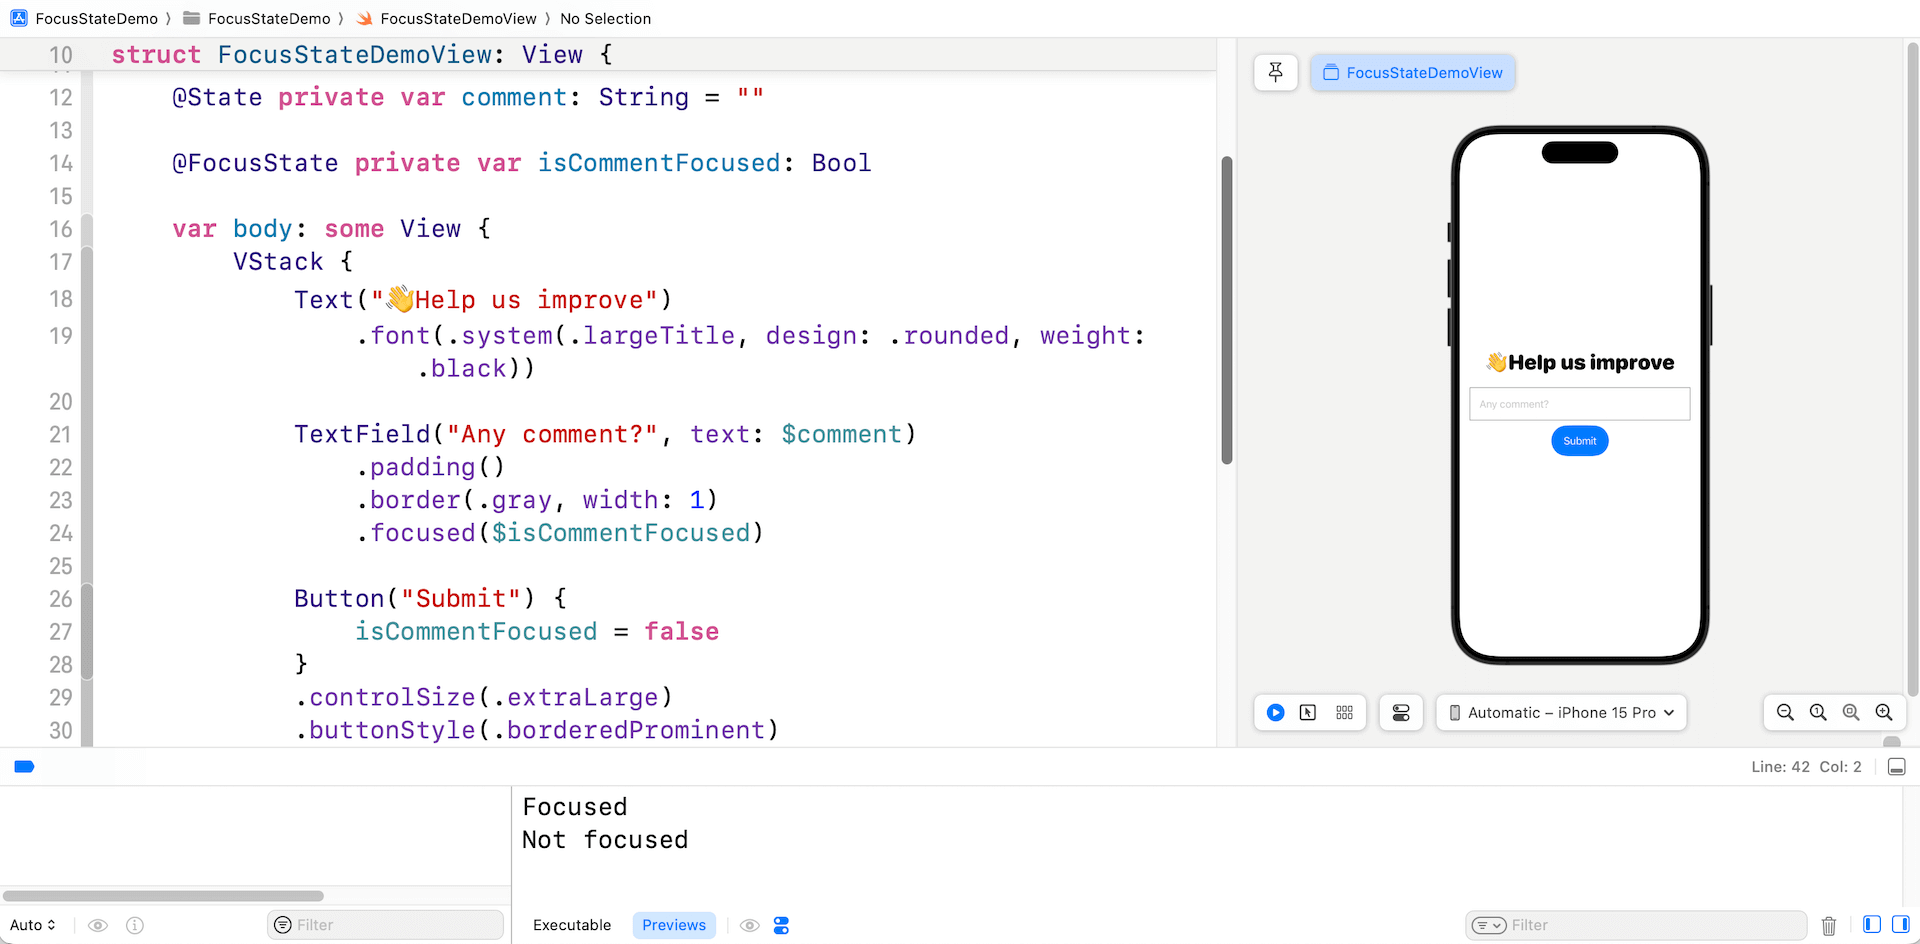
struct FocusStateDemoView: View {

    @State personal var remark: String = ""

    @FocusState personal var isCommentFocused: Bool

    var physique: some View {
        VStack {
            Textual content("👋Assist us enhance")
                .font(.system(.largeTitle, design: .rounded, weight: .black))

            TextField("Any remark?", textual content: $remark)
                .padding()
                .border(.grey, width: 1)
                .centered($isCommentFocused)

            Button("Submit") {
                isCommentFocused = false
            }
            .controlSize(.extraLarge)
            .buttonStyle(.borderedProminent)

        }
        .padding()
        .onChange(of: isCommentFocused) { oldValue, newValue in
            print(newValue ? "Centered" : "Not centered")
        }
    }
}
Within the code above, we create a easy kind with a “remark” textual content subject. We’ve a property named isCommentFocused, which is annotated with @FocusState to maintain monitor of the main focus state of the textual content subject. For the “remark” subject, we connect the centered modifier and bind the isCommentFocused property.
By doing so, SwiftUI robotically displays the main focus state of the “remark” subject. When the sphere is in focus, the worth of isCommentFocused might be set to true. Conversely, when the sphere loses focus, the worth might be up to date to false. You can too programmatically management the main focus of the textual content subject by updating its worth. As an illustration, we reset the main focus by setting isCommentFocused to false when the Submit button is tapped.
The onChange modifier is used to disclose the change of the main focus state. It displays the isCommentFocused variable and print out its worth.
If you check the app demo within the preview pane, the console ought to show the message “Centered” when the “remark” subject is in focus. Moreover, tapping the Submit button ought to set off the message “Not centered” to look.
Utilizing Enum to Handle Focus States
Utilizing a boolean variable works successfully if you solely want to trace the main focus state of a single textual content subject. Nonetheless, it will probably develop into cumbersome when it’s important to deal with the main focus state of a number of textual content fields concurrently.
Fairly than boolean variables, you possibly can outline an enum kind which conforms to Hashable to handle the main focus states of a number of textual content fields (or SwiftUI views).
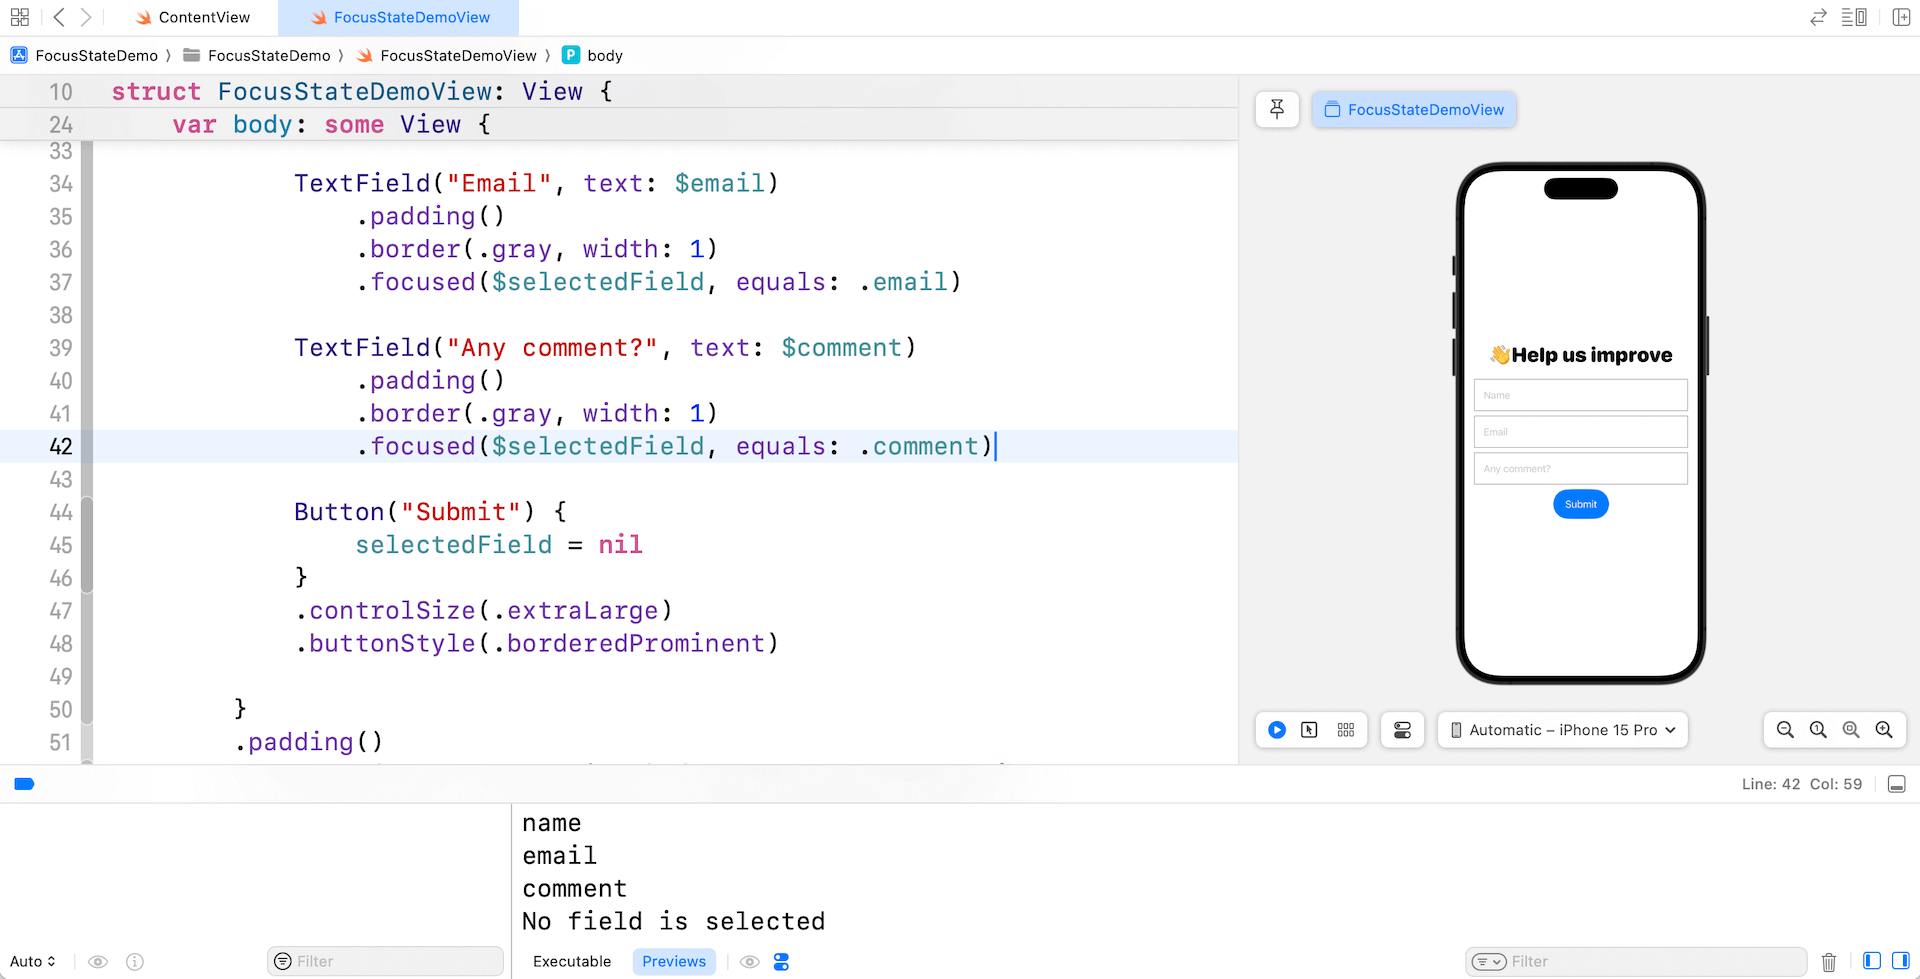
Let’s proceed for instance this system with the identical app demo. We are going to add two extra textual content fields together with title and e mail to the shape view. Right here is the modified program:
struct FocusStateDemoView: View {

    enum Discipline: Hashable {
        case title
        case e mail
        case remark
    }

    @State personal var title: String = ""
    @State personal var e mail: String = ""
    @State personal var remark: String = ""

    @FocusState personal var selectedField: Discipline?

    var physique: some View {
        VStack {
            Textual content("👋Assist us enhance")
                .font(.system(.largeTitle, design: .rounded, weight: .black))

            TextField("Title", textual content: $title)
                .padding()
                .border(.grey, width: 1)
                .centered($selectedField, equals: .title)

            TextField("Electronic mail", textual content: $e mail)
                .padding()
                .border(.grey, width: 1)
                .centered($selectedField, equals: .e mail)

            TextField("Any remark?", textual content: $remark)
                .padding()
                .border(.grey, width: 1)
                .centered($selectedField, equals: .remark)

            Button("Submit") {
                selectedField = nil
            }
            .controlSize(.extraLarge)
            .buttonStyle(.borderedProminent)

        }
        .padding()
        .onChange(of: selectedField) { oldValue, newValue in
            print(newValue ?? "No subject is chosen")
        }
    }
}
To effectively handle the main focus of a number of textual content fields, we keep away from defining extra boolean variables and as an alternative introduce an enum kind referred to as Discipline. This enum conforms to the Hashable protocol and defines three circumstances, every representing one of many textual content fields within the kind.
Utilizing this enum, we make the most of the @FocusState property wrapper to declare the selectedField property. This property permits us to conveniently monitor the at present centered textual content subject.
To determine the connection, every textual content subject is related to the centered modifier, which binds to the main focus state property utilizing the matching worth. For instance, when the main focus strikes to the “remark” subject, the binding units the sure worth to .remark.
Now you can check the code adjustments. If you faucet any of the fields, the console will show the title of the respective textual content subject. Nonetheless, should you faucet the Submit button, the console will present the message “No subject is chosen.”
You’re allowed to programmatically change the main focus of the textual content subject. Let’s change the motion block of the Submit button like this:
Button("Submit") {
    selectedField = .e mail
}
By setting the worth of selectedField to .e mail for the Submit button, the app will robotically shift the main focus to the e-mail subject when the Submit button is tapped.
Working with FocusedValue
Now that it is best to perceive how @FocusState works, let’s change over to the following property wrapper @FocusedValue. This property wrapper permits builders to watch the worth of the at present focus textual content subject (or different focusable views).
To higher perceive the utilization, let’s proceed to work on the instance. Let’s say, we wish to add a preview part under the shape that shows the person’s remark, however we solely need the remark to be seen when the remark subject is concentrated. Beneath is the pattern code of the preview part:
struct CommentPreview: View {

    var physique: some View {
        VStack {
            Textual content("")
        }
        .body(minWidth: 0, maxWidth: .infinity)
        .body(top: 100)
        .padding()
        .background(.yellow)
    }
}
And, we put the preview proper under the Submit button like this:
struct FocusStateDemoView: View {

    ...

    var physique: some View {
        VStack {

            .
            .
            .

            Button("Submit") {
                selectedField = nil
            }
            .controlSize(.extraLarge)
            .buttonStyle(.borderedProminent)

            Spacer()

            CommentPreview()
        }
        .padding()
        .onChange(of: selectedField) { oldValue, newValue in
            print(newValue ?? "No subject is chosen")
        }
    }
}
As a way to monitor the change of the remark subject, we first create a struct that conforms to the FocusedValueKey protocol. Within the struct, we outline the kind of the worth to look at. On this case, remark has a kind of String.
struct CommentFocusedKey: FocusedValueKey {
    typealias Worth = String
}
Subsequent, we offer an extension for FocusedValues with a computed property that makes use of the brand new key to get and set values.
extension FocusedValues {
    var commentFocusedValue: CommentFocusedKey.Worth? {
        get { self[CommentFocusedKey.self] }
        set { self[CommentFocusedKey.self] = newValue }
    }
}
After getting all these arrange, you possibly can connect the focusedValue modifier to the “remark” textual content subject and specify to look at the remark’s worth.
TextField("Any remark?", textual content: $remark)
    .padding()
    .border(.grey, width: 1)
    .centered($selectedField, equals: .remark)
    .focusedValue(.commentFocusedValue, remark)
Now return to the CommentPreview struct and declare a remark property utilizing the @FocusedValue property wrapper:
struct CommentPreview: View {

    @FocusedValue(.commentFocusedValue) var remark

    var physique: some View {
        VStack {
            Textual content(remark ?? "Not centered")
        }
        .body(minWidth: 0, maxWidth: .infinity)
        .body(top: 100)
        .padding()
        .background(.yellow)
    }
}
We make the most of the @FocusedValue property wrapper to watch and retrieve the latest worth of the remark subject when it’s in focus.
Now, as you kind any textual content within the remark subject, the preview part ought to show the identical worth. Nonetheless, if you navigate away from the remark subject, the preview part will show the message “Not centered.”

Utilizing @FocusedObject
@FocusedValue is used to watch the change of a price kind. For reference kind, you should utilize one other property wrapper referred to as @FocusedObject. Let’s say, on high of the remark subject, you wish to show the content material of the title and e mail fields within the preview part.
To do this, you possibly can outline a category that conforms to the ObservableObject protocol like this:
class FormViewModel: ObservableObject {
    @Printed var title: String = ""
    @Printed var e mail: String = ""
    @Printed var remark: String = ""
}
Within the kind view, we are able to declare a state object for the view mannequin:
@StateObject personal var viewModel: FormViewModel = FormViewModel()To affiliate the observable object with the main focus, we connect the focusedObject modifier to the textual content fields like under:
TextField("Title", textual content: $viewModel.title)
    .padding()
    .border(.grey, width: 1)
    .centered($selectedField, equals: .title)
    .focusedObject(viewModel)

TextField("Electronic mail", textual content: $viewModel.e mail)
    .padding()
    .border(.grey, width: 1)
    .centered($selectedField, equals: .e mail)
    .focusedObject(viewModel)

TextField("Any remark?", textual content: $viewModel.remark)
    .padding()
    .border(.grey, width: 1)
    .centered($selectedField, equals: .remark)
    .focusedObject(viewModel)
For the CommentPreview struct, we use the @FocusedObject property wrapper to retrieve the change of the values:
struct CommentPreview: View {

    @FocusedObject var viewModel: FormViewModel?

    var physique: some View {
        VStack {
            Textual content(viewModel?.title ?? "Not centered")
            Textual content(viewModel?.e mail ?? "Not centered")
            Textual content(viewModel?.remark ?? "Not centered")
        }
        .body(minWidth: 0, maxWidth: .infinity)
        .body(top: 100)
        .padding()
        .background(.yellow)
    }
}
Abstract
This tutorial explains the way to use SwiftUI’s focus administration API, particularly @FocusState, @FocusedValue, and @FocusedObject. By leveraging these wrappers, you possibly can effectively monitor adjustments in focus state and entry the values of focusable views. These highly effective instruments allow builders to ship enhanced person experiences throughout varied platforms, together with iOS, macOS, and tvOS purposes.
I hope you get pleasure from this tutorial. When you have any questions, please depart me remark under.

 Evaluation of a