The Toolbar API has been accessible for a substantial interval, having been launched with the discharge of iOS 14. It was a precious addition to the SwiftUI framework, enabling builders to include menu gadgets within the navigation and backside bars. In iOS 16, Apple unveiled further modifiers to additional improve the customization of toolbars and supply builders with higher management over their look.
On this tutorial, let me present you the best way to work with toolbars and handle its customizations.
Utilizing the Toolbar Modifier to Populate Navigation Bar Objects
Whether or not it’s essential to populate gadgets in navigation bars or toolbars, you may make the most of the .toolbar modifier to attain this goal. Right here is an instance:
struct ContentView: View {
var physique: some View {
NavigationStack {
Listing(1..<10, id: .self) { index in
NavigationLink("Merchandise (index)") {
Picture("legomen")
.resizable()
.ignoresSafeArea()
}
}
.navigationTitle("Toolbar Demo")
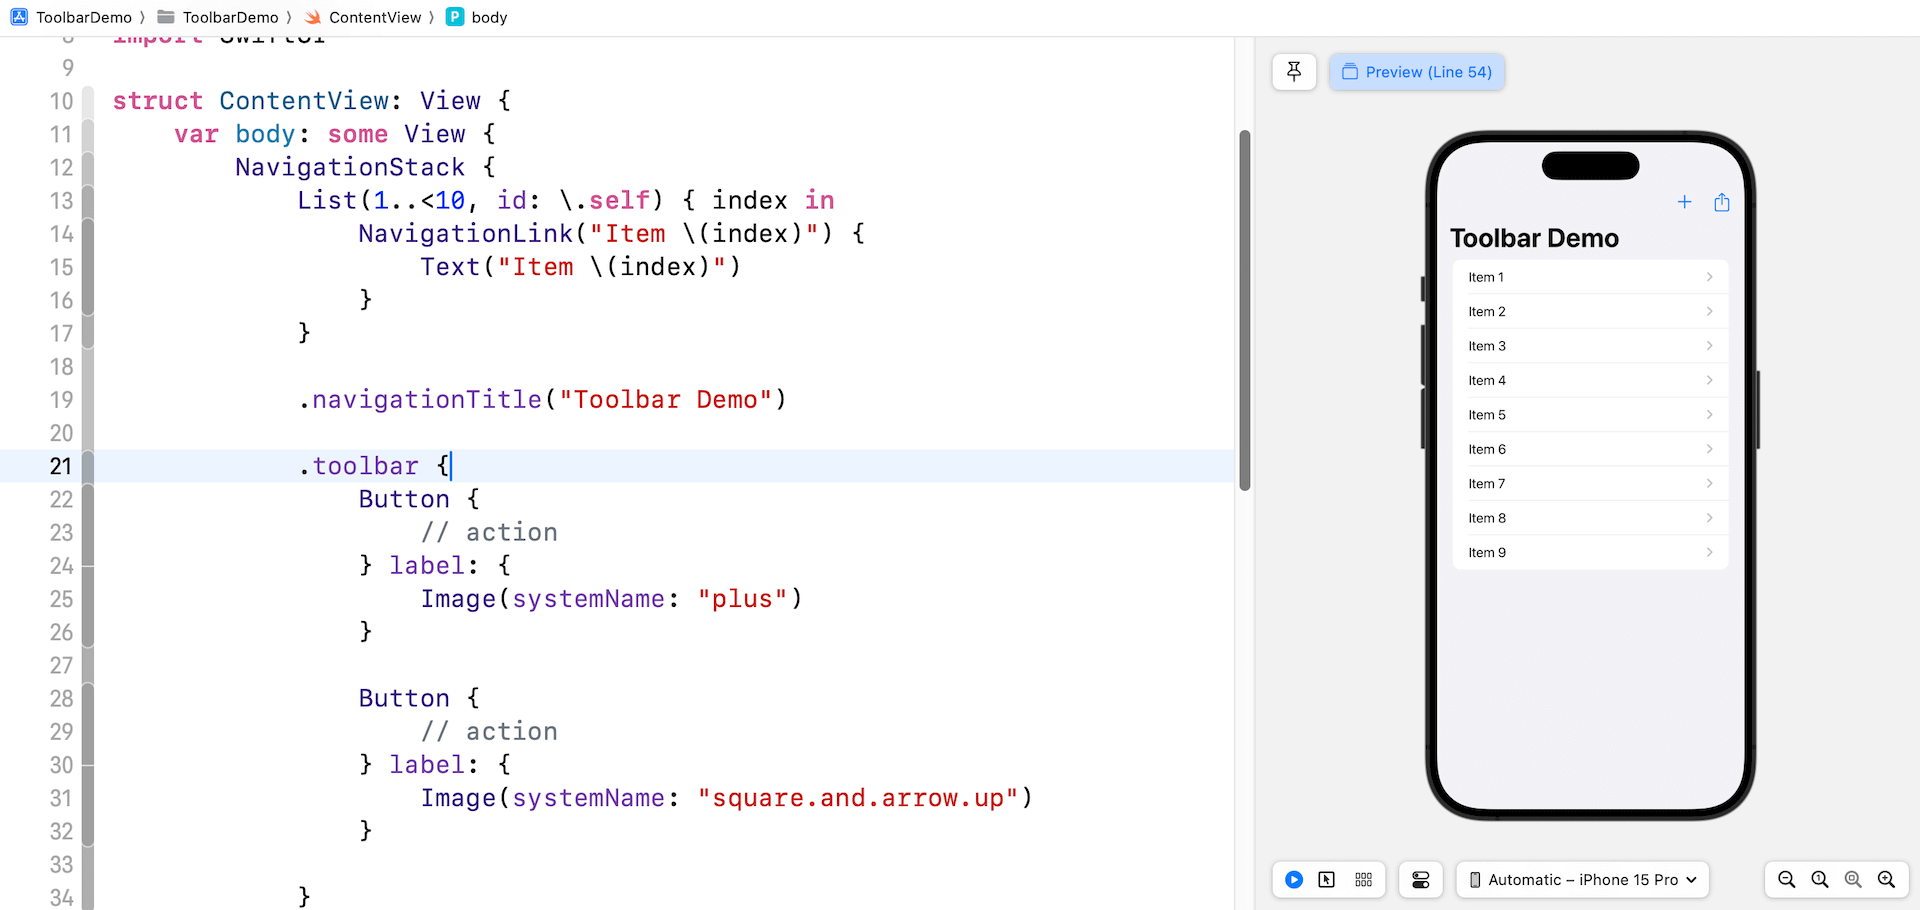
.toolbar {
Button {
// motion
} label: {
Picture(systemName: "plus")
}
Button {
// motion
} label: {
Picture(systemName: "sq..and.arrow.up")
}
}
}
}
}Contained in the closure of toolbar, we create a pair of normal buttons utilizing system photos. With out explicitly specifying the position of the buttons, SwiftUI robotically positions them within the top-right nook of the navigation bar.
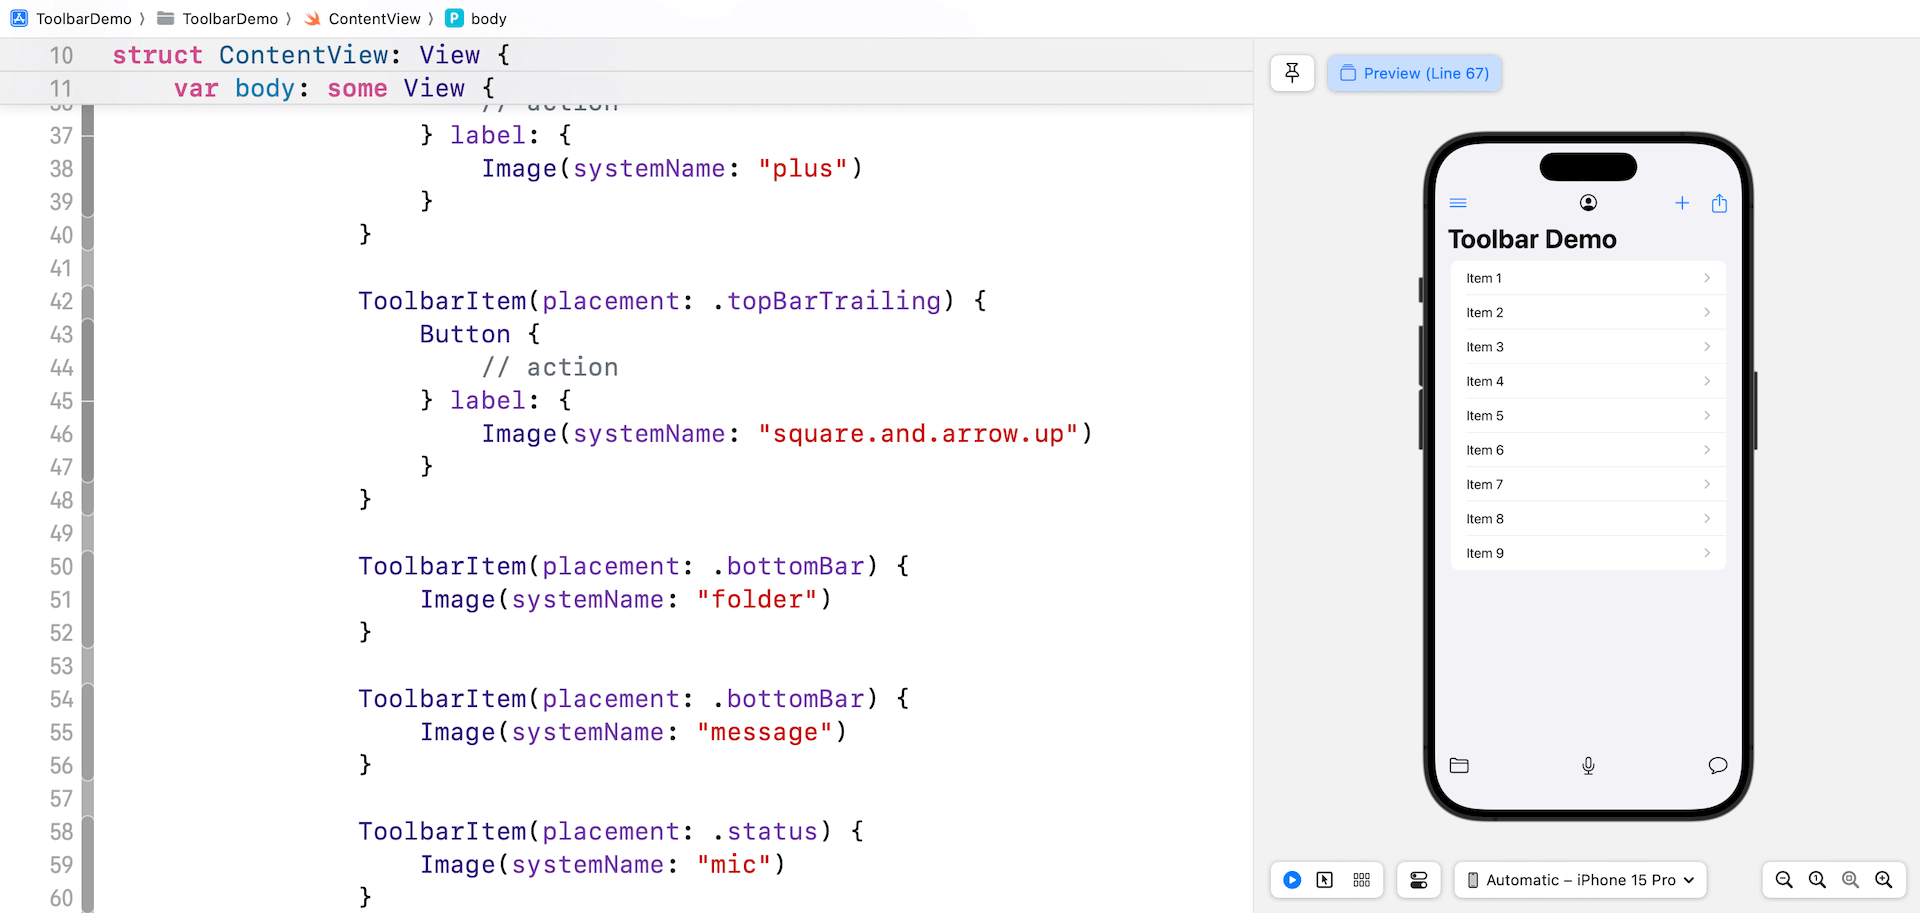
Utilizing ToolbarItem
If it’s essential to add extra gadgets to the navigation bar, you may proceed so as to add buttons within the toolbar closure. Nonetheless, if you wish to management the position of the gadgets, you may present a set of views with every view wrapped in a ToolbarItem. Under is an instance:
.toolbar {
    ToolbarItem(placement: .principal) {
        Picture(systemName: "individual.crop.circle")
    }

    ToolbarItem(placement: .topBarLeading) {
        Button {
            // motion
        } label: {
            Picture(systemName: "line.3.horizontal")
        }
    }

    ToolbarItem(placement: .topBarTrailing) {
        Button {
            // motion
        } label: {
            Picture(systemName: "plus")
        }
    }

    ToolbarItem(placement: .topBarTrailing) {
        Button {
            // motion
        } label: {
            Picture(systemName: "sq..and.arrow.up")
        }
    }

    ToolbarItem(placement: .bottomBar) {
        Picture(systemName: "folder")
    }

    ToolbarItem(placement: .bottomBar) {
        Picture(systemName: "message")
    }

    ToolbarItem(placement: .standing) {
        Button {

        } label: {
            Textual content("Conceal Navigation")
        }
        .buttonStyle(.borderedProminent)
        .controlSize(.extraLarge)
    }
}
Every ToolbarItem lets you outline the place of the merchandise by using the placement parameter. So as to add gadgets within the navigation bar, you may specify the next values:
.topBarLeading– Locations the merchandise in the vanguard of the highest bar..topBarTrailing– Locations the merchandise within the trailing fringe of the highest bar..precept– Locations the merchandise within the principal merchandise part,which is the middle of the navigation bar.
So as to add gadgets within the backside bar, you may set the worth to .bottomBar and .standing:
.bottomBar– Locations the merchandise within the backside toolbar..standing– In iOS and iPadOS, the system locations standing gadgets within the middle of the underside toolbar.
The right way to Conceal the Navigation Bar and Backside Bar
Ranging from iOS 16, the toolbar modifier gives builders the flexibility to handle the visibility of toolbars, together with the navigation bar and backside bar. To cover the navigation bar, you may insert the toolbar modifier inside NavigationStack like this:
.toolbar(.hidden, for: .navigationBar)If you wish to present an possibility for customers to cover/present the navigation bar, you may declare a state variable like beneath:
@State personal var showNavBar = trueThen you may replace the .toolbar modifier like this:
.toolbar {

      .
      .
      .

      ToolbarItem(placement: .standing) {
        Button {
            showNavBar.toggle()
        } label: {
            Textual content(showNavBar ? "Conceal Navigation" : "Present Navigation")
        }
        .buttonStyle(.borderedProminent)
        .controlSize(.extraLarge)
    }
}
.toolbar(showNavBar ? .seen : .hidden, for: .navigationBar)
.animation(.easeInOut, worth: showNavBar)
To cover the visibility of the underside bar, you may exchange .navigationBar with .bottomBar. Right here is an instance:
.toolbar(.hidden, for: .bottomBar)Controlling the Visibility of Toolbar Background
SwiftUI gives one other modifier referred to as toolbarBackground for builders to regulate the visibility of the toolbar background. To make the navigation bar background clear, you may set the worth of toolbarBackground to .hidden:
.toolbarBackground(.hidden, for: .navigationBar)To make the background seen, you may set the worth to .seen. Right here is an instance:
Listing(1..<10, id: .self) { index in
    NavigationLink("Merchandise (index)") {
        Picture("legomen")
            .resizable()
            .ignoresSafeArea()
            .toolbarBackground(.seen, for: .navigationBar)
    }
}
After making the code modifications, it is best to see a navigation bar with a blurred background when navigating to the element view.
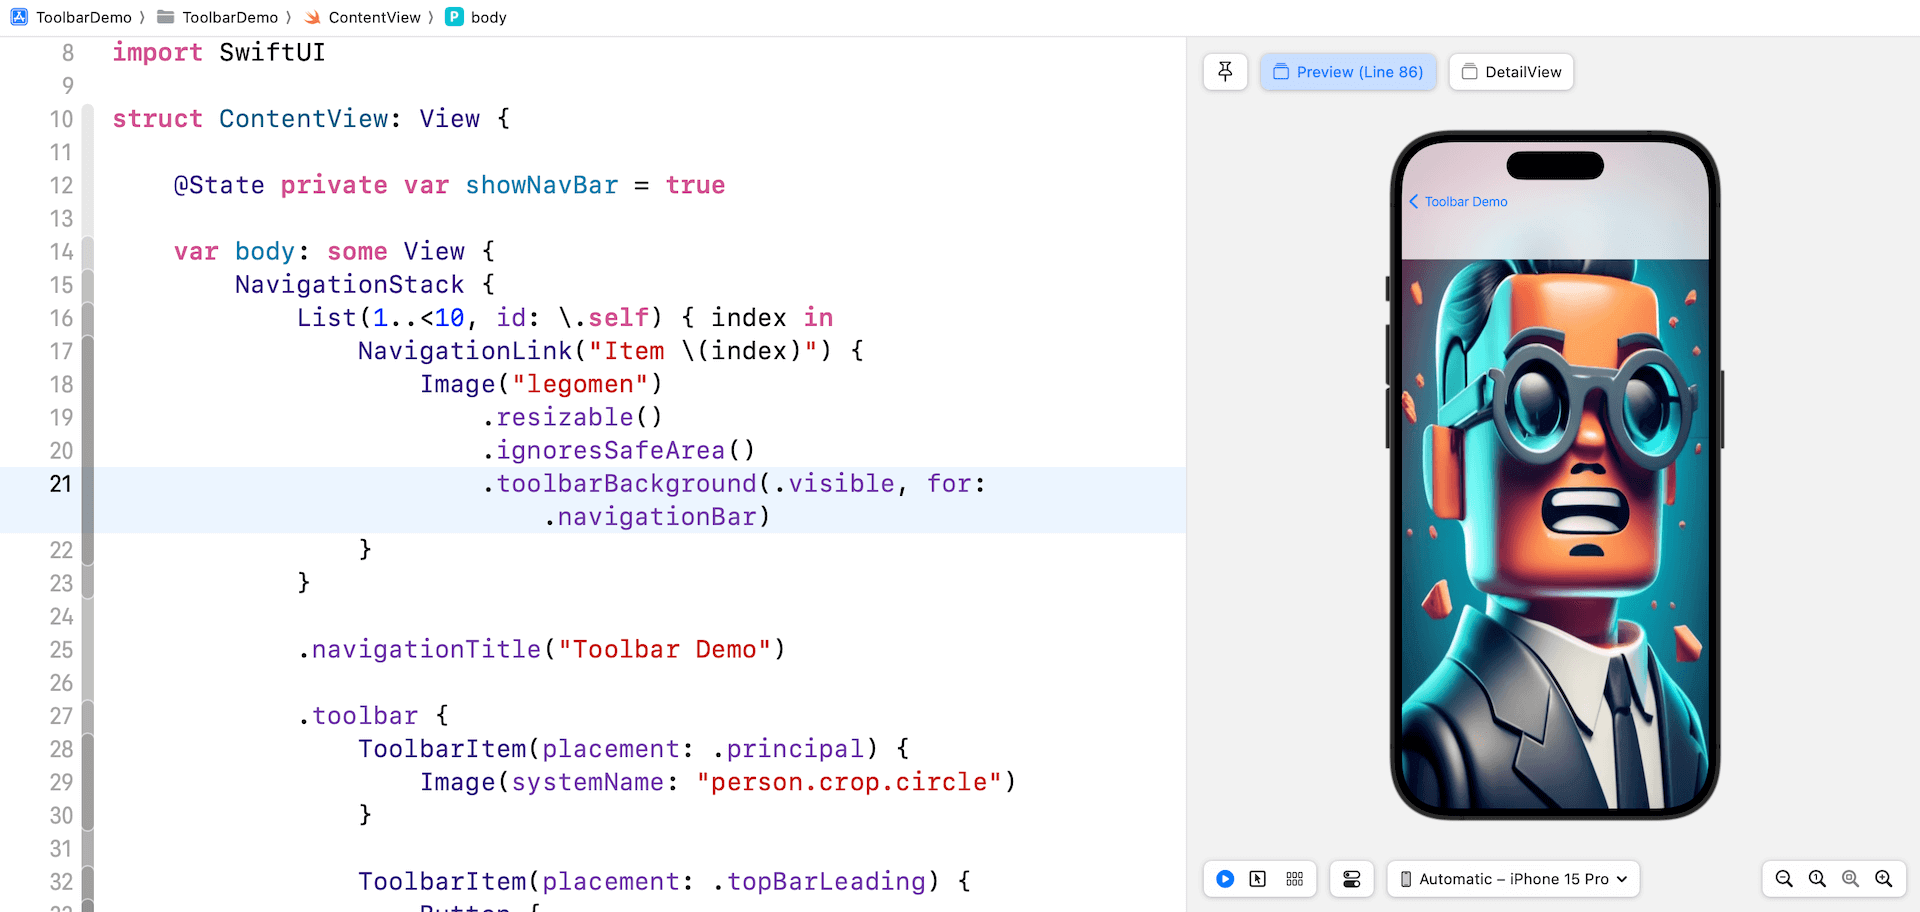
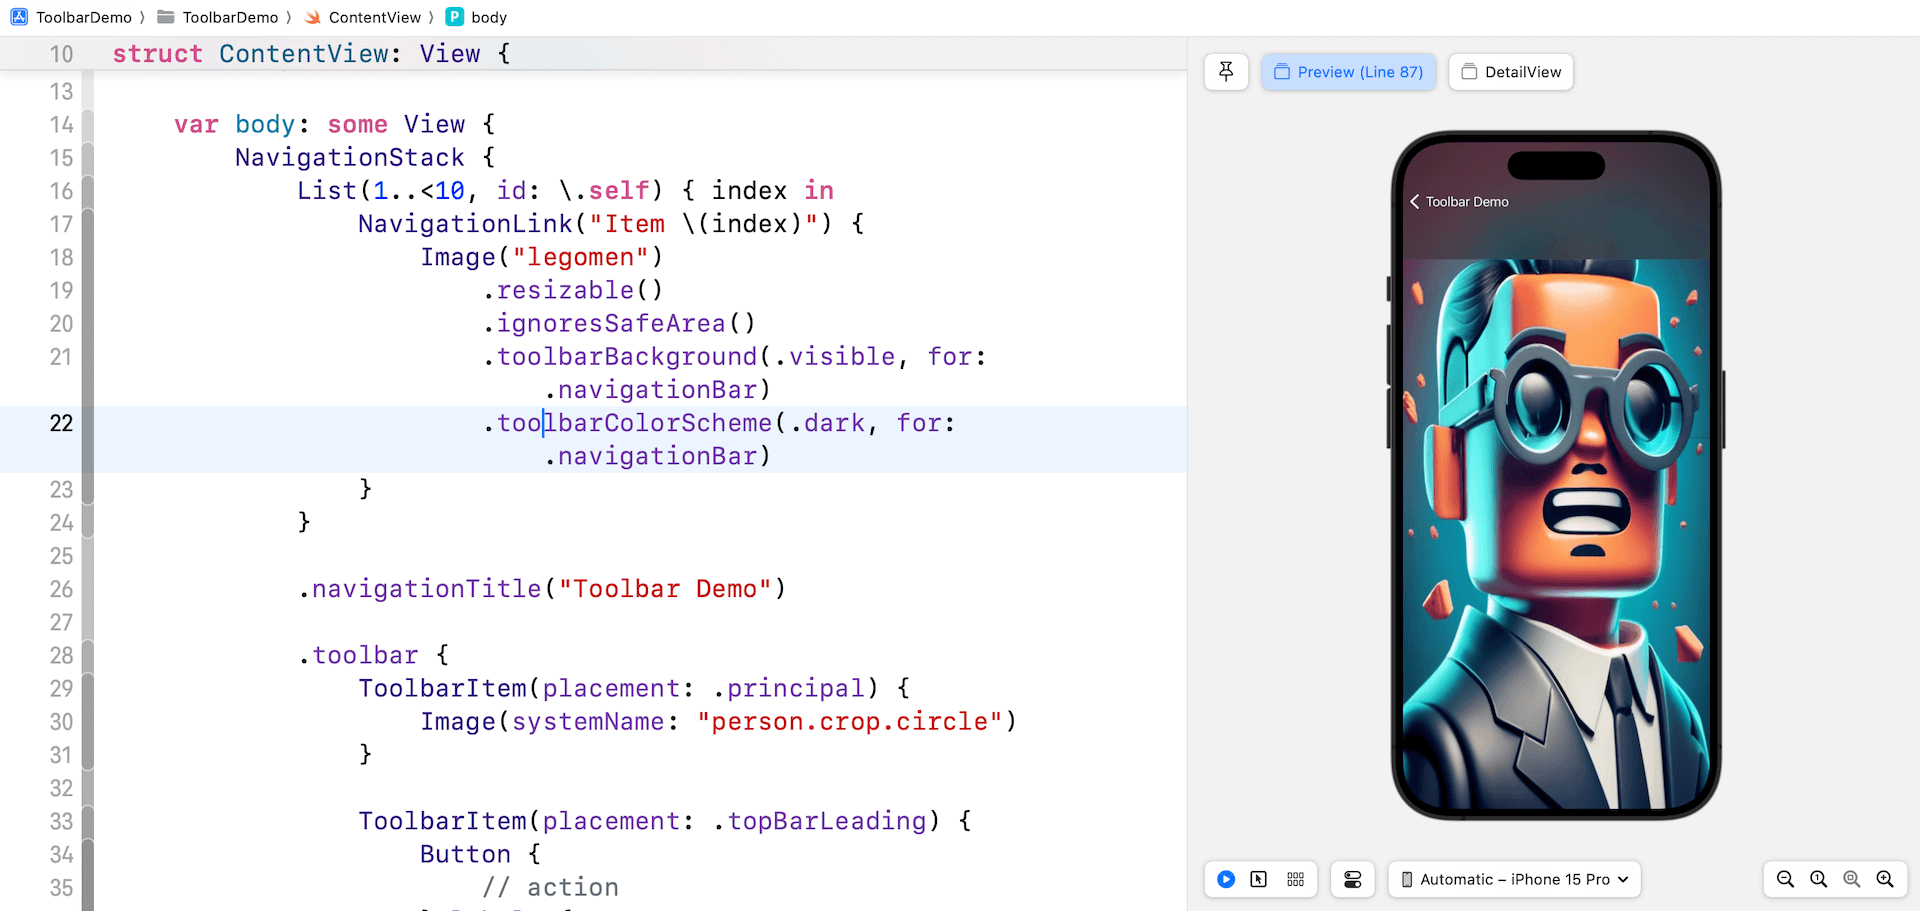
Toolbar Shade Scheme
You may exert further management over the colour scheme of the navigation bar or backside bar by using the toolbarColorScheme modifier. For example, to use darkish mode to the navigation bar of the element view, you may apply the toolbarColorScheme modifier to the Picture view as demonstrated beneath:
.toolbarColorScheme(.darkish, for: .navigationBar)Now, once you navigate to the element view, the navigation bar modifications to darkish mode.
Abstract
All through this tutorial, we’ve coated the basics of the Toolbar APIs and explored the best way to populate gadgets in toolbars. Because the SwiftUI framework continues to evolve, it gives builders an expanded vary of functionalities to customise the looks of navigation and backside bars. These developments allow builders to create extra visually interesting and tailor-made person interfaces of their SwiftUI apps.
If you wish to be taught extra about SwiftUI, you may try our Mastering SwiftUI e-book. It’s now totally up to date for Xcode 15 and iOS 17.